Guide: Corroded Exhaust Removal
Using the Mini-Ductor® Induction Heater & Flameless Torch
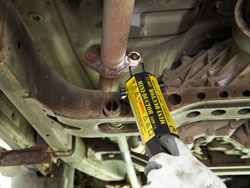
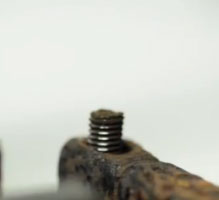
If you’re looking to remove a rusted and corroded exhaust and replace it with a new one, it can be a time consuming and frustrating task. The nuts securing the bolts rust easily and the corroded exhaust pipe can be extremely difficult to separate.
The good news is there’s no longer any need to sweat or possibly injure yourself by prying, pulling, twisting or banging on the pipes to separate the rest of the exhaust again!
How Does It Work?
The Mini-Ductor handheld induction heating tool uses flameless INVISIBLE HEAT® that heats ferrous metal (containing iron), and some non-ferrous metal, parts in seconds. This allows all types of adhesives bonded to metal, bonded with thread lock compound and seized hardware to be removed and released much quicker and more safely than by traditional naked flame heating. And there’s no costly and time consuming damage to surrounding areas.
Different Coils Makes Your Job Easier
The innovative induction heating method expands the metal and breaks down the corrosion bonds. The Mini-Ductor coils come in different diameters to suit different nut sizes and the Bearing Buddy flexible, heat resistant coil is ideal for this application (see images below).
Why Use Induction Heating Instead of a Torch?
- Better safety
- Works faster
- Increased productivity and profits
- Increased competitive advantage
Step-by-Step Instructions
- Equipment needed: heat resistant gloves, overalls, goggles and a respirator mask (if smoke will be produced from heating)
- Knowledge required: a well-reviewed proficiency of the Mini-Ductor’s safety and operating instructions
Step 1: Use a preformed coil to remove the nut. Remember: the nut remains very hot so you may see small amounts of smoke. 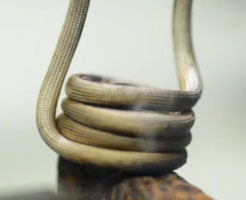
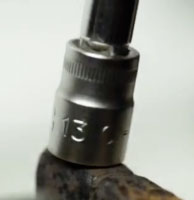
Step 2: Select the correct tool. Remove the nut while still hot and be careful.
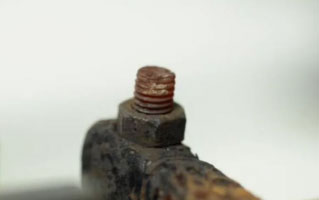
Step 3: The nut is removed cleanly and easily, with no damage to the surrounding area.
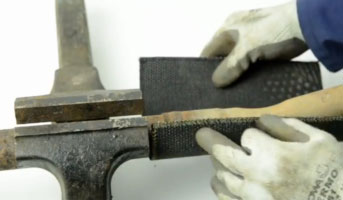
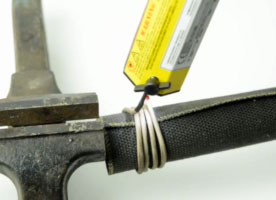
Step 4: Wrap a fibreglass cloth around the exhaust. Hold it in place
Step 5: Wrap the Bearing Buddy Coil around the cloth while not attached to the Mini-Ductor. 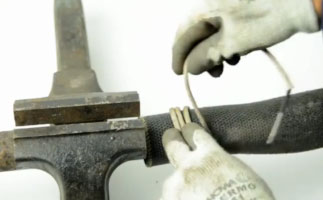
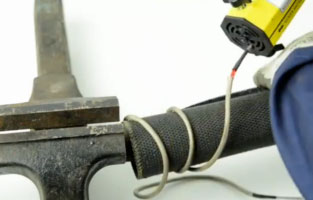
Step 6: Attach the Mini-Ductor.
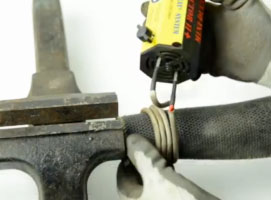
Step 7: Heat the exhaust. Caution: the exhaust will remain very hot.
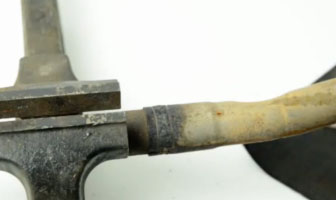
Step 8: The heat breaks down the corrosion. Remove the Bearing Buddy Coil and fibreglass cloth. Caution: the exhaust pipe will remain hot!
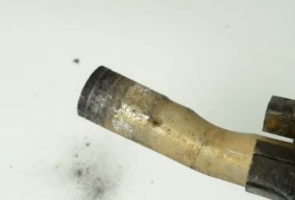
Step 9: Use a hammer to loosen the joint and separate the exhaust while still hot.
How to separate a corroded exhaust with a Mini-Ductor® II +